 Home
HomeInstallation & License Management
This document will walk you through the installation process of Aspherix® GUI and Solver on Microsoft Windows and Linux.
If you encounter any issues on the way or are looking for answers, please have a look at the knowledge database) or create a ticket here.
Prerequisites
Aspherix® is supported for the following operating systems:
Windows: Windows 10, 11
Linux: CentOS Stream 9, Rocky Linux 9, Red Hat 9 or newer, Ubuntu 20.04 or newer, Suse Enterprise 12 or 15, Suse tumbleweed, Amazon Linux 2023 Most other modern Linux systems with glibc version 2.28 or higher can be used as well, but without warranty. For GUI usage, OpenGL 3.2 or newer is required
Special cases:
Windows Server 2019 & 2022: OpenGL 3.2 is needed
Centos Stream 8: Aspherix® GUI support cannot be guaranteed
Windows Subsystem for Linux: Aspherix® GUI support cannot be guaranteed
Recommended hardware: Quad or Octo Core processor, 16 GB RAM, screen resolution 1920 x 1080
Minimal hardware requirements: Dual or Quad Core processor, 4GB RAM, screen resolution 1280 x 720.
On Linux systems make sure that MPI is installed on the machine you want to run Aspherix® on. The installed version has to support MPI-3 standard (e.g., OpenMPI 1.8 or MPICH v3.0). Under Ubuntu, MPI can be installed by the following command:
sudo apt install openmpi-bin
On CentOS/Red Hat, the following command can be used:
sudo yum install openmpi
Note that both commands require administrator privileges.
On Windows systems, Microsoft MPI will be installed during the Aspherix® installation procedure. If a more recent version of Microsoft MPI is found during the installation, it will not be changed, older versions can be updated.
During the installation process on Windows also Microsoft Visual C++ Redistributables are installed automatically. In case they have been installed before, please select the option “Repair”.
For using the API of Aspherix® Solver cmake is required (minimal version: cmake 3.9).
The operating system has to be up to date and a 64 bit architecture is required.
When using an online license server, port 5053 and a second port, which is mentioned in the license file, need to be open. For the correct installation of an inhouse license server please follow the instructions shipped with the server application or contact your IT department.
On Ubuntu 22.04 and 24.04 the following packages are required:
libxcb-xinput0
libxcb-cursor-dev
libxcb-xinerama0
If they are not yet installed already, this can be done with the following command:
sudo apt install libxcb-xinput0 libxcb-cursor-dev libxcb-xinerama0
Screencasts
Screencasts for the installation and getting started can be found here:
Installation
The installation can be launched from a file browser or from a shell.
Note
Under Linux, it may be necessary to change the file permissions
of the installer to make it executable. This can be achieved by the
shell command chmod a+x path/to/installer/file
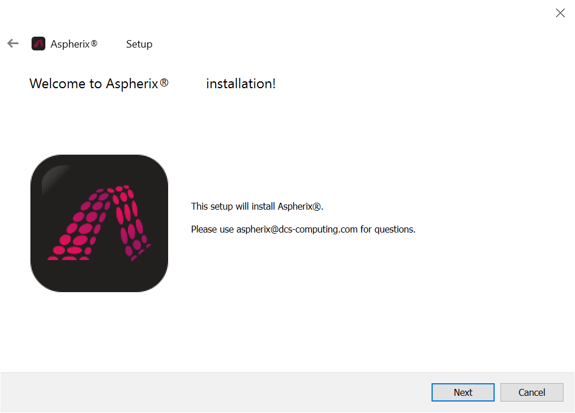
Under Windows, a security warning might pop up - click “run” to continue installation. This starting page is displayed, click “Next” to continue:
Next, you are asked to specify the installation folder for Aspherix®.
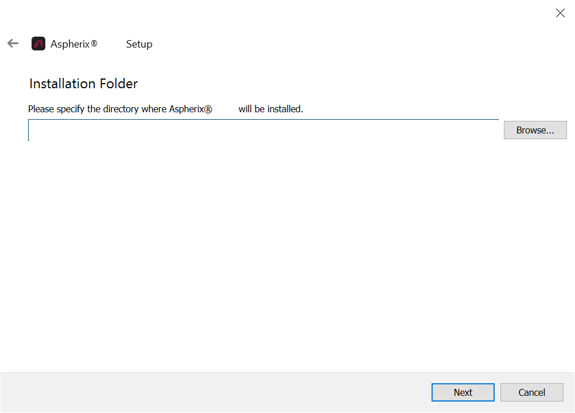
Under Windows, a location in your user directory is proposed.
Under Linux, the installer proposes a destination in your home directory if started as user, and a location in /opt if started with root privileges.
After choosing a destination folder, the installer options dialogue appears.
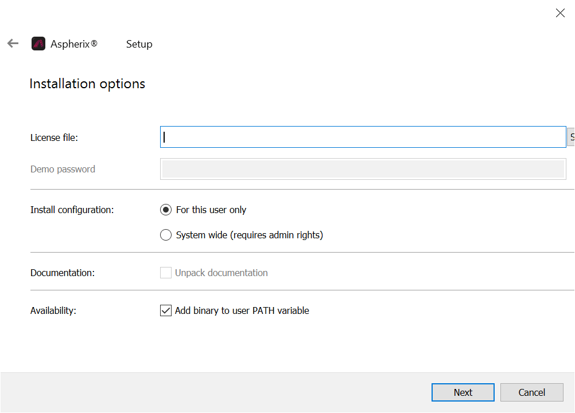
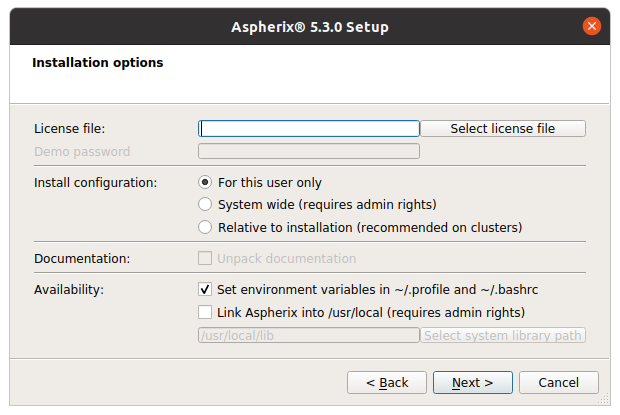
A license file is required to install Aspherix®, you should have received one. For demo versions, a password is also required. If you lack any of these, please contact us through the support platform. Next, choose if you wish to install Aspherix® for all users on the system (requires root privileges) just for this user, or (particularly interesting for the installation on clusters) “relative to installation”. For a system-wide installation it is recommended to check the “Link Aspherix into /usr” (Linux) or “Add binary to user PATH” (Windows) tickbox, so a system-wide symlink becomes available. When choosing the install option “relative to installation” the user does not need access to any particular paths as for example /etc, the configuration file is written to the share/aspherix folder, relative to the local installation.
Note that the “Unpack documentation” checkbox only becomes available once you enter a valid license file.
Please do not uncheck the option “Unpack documentation”, otherwise it will not be automatically available after the installation.
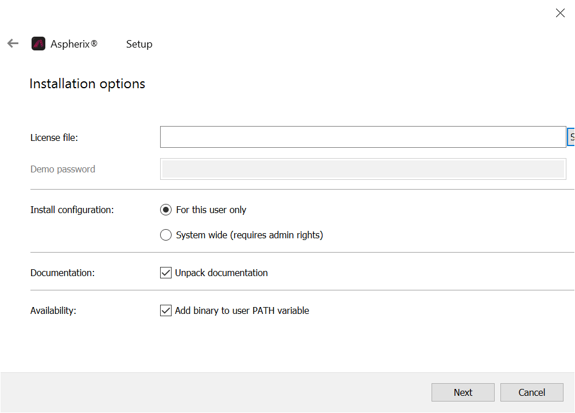
Note
If you do not have a valid license file available during installation, or if the license cannot connect to the license server you can unpack the documentation any time running aspherix -re from the command line. Alternatively, you can repeat the documenation extraction from the Aspherix-GUI. Go to File > Options and, in the appearing dialog, select Extract documentation.
Note
When chosing the bashrc option in the Availability section under Linux a new entry is added to the bashrc file. When uninstalling Aspherix® at a later time the bashrc file is reset to its state before the Aspherix® installation. Changes that are made after this time might be lost!
If none of the options in the Availability section is selected in Linux, the following block of variables can be added to your bashrc in Linux:
export PATH=$PATH:INSTALLATION_PATH/Aspherix-7.1.0/bin
export LD_LIBRARY_PATH=$LD_LIBRARY_PATH:INSTALLATION_PATH/Aspherix-7.1.0/lib
export LIBRARY_PATH=$LIBRARY_PATH:INSTALLATION_PATH/Aspherix-7.1.0/lib
export C_INCLUDE_PATH=$C_INCLUDE_PATH:INSTALLATION_PATH/Aspherix-7.1.0/include/aspherix
export CXX_INCLUDE_PATH=$CXX_INCLUDE_PATH:INSTALLATION_PATH/Aspherix-7.1.0/include/aspherix
where INSTALLATION_PATH has to be replaced by your installation path.
Both in Windows and Linux, Aspherix® Solver can be launched from within the installation folder (INSTALLATION_PATH/Aspherix-7.1.0/bin) at any time.
Next, you can choose which components to install. Please note that all components can be installed, but only those for which a valid license is found can be used. With a pure Aspherix® Solver / HPC license it is possible to install GUI and Calibration as well but neither of the components will be functional. The Windows installer offers the possibility to install Microsoft MPI, on Linux MPI must be installed by the user. Other offered third party components are ParaView and the ParaView macros. The latter can be used with the distributed ParaView or a custom ParaView installation (ParaView 5.8.0 or newer is required) and they help with the automated visualization of the simulation results (please see tutorials for postprocessing in Aspherix® Solver documentation).
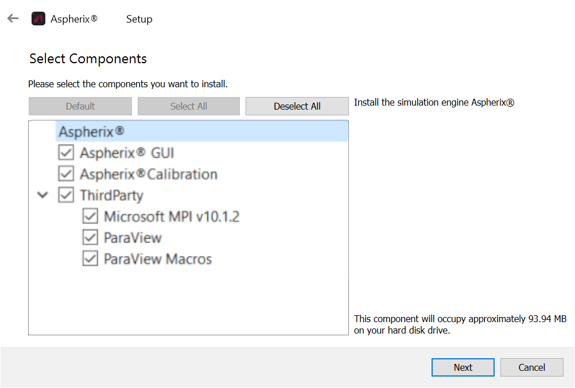
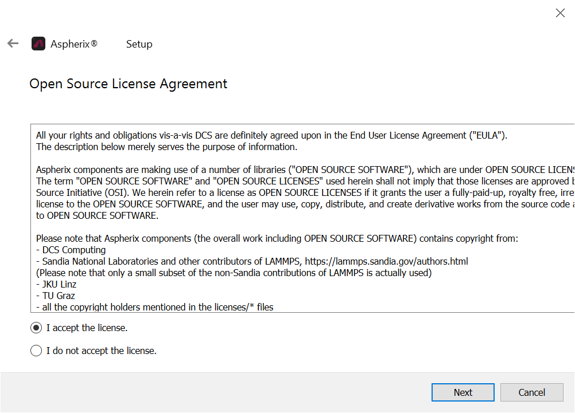
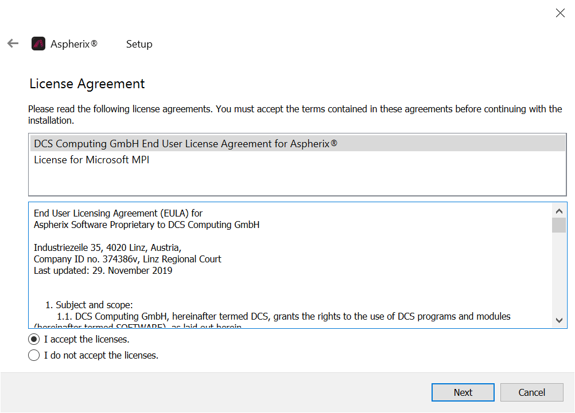
To continue with the installation, it is necessary to accept the Open Source License Agreement and the End User License Agreement:
Under Windows, it is possible to create a start menu entry:
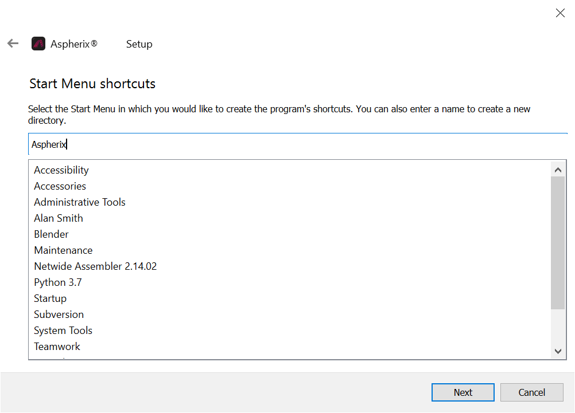
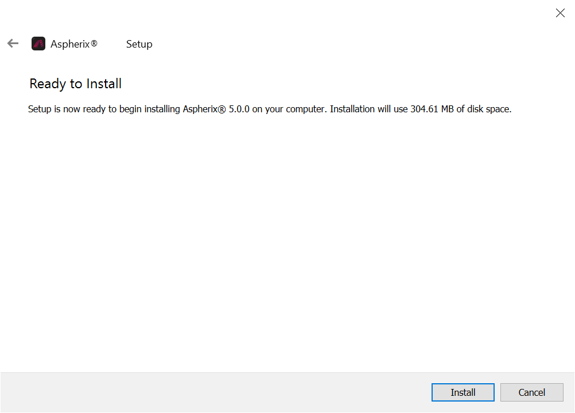
Now everything is set up and the installation will be performed when clicking the “Install” button.
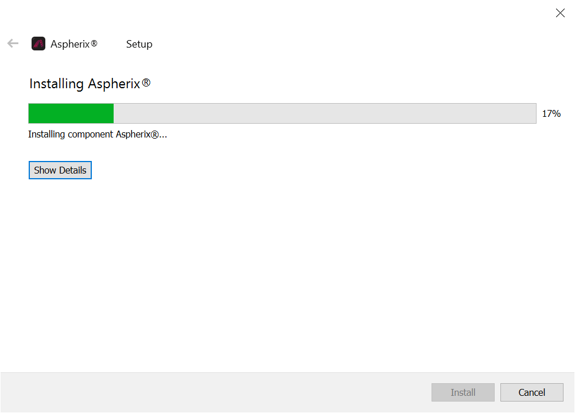
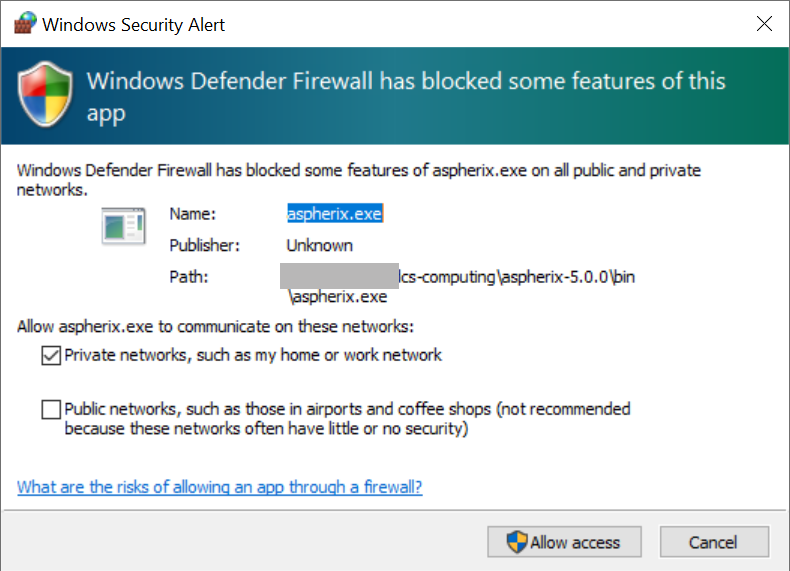
Under Windows, it is possible that a firewall warning appears during the installation process. This is because Aspherix® establishes contact with the license server to check the validity of the provided license file.
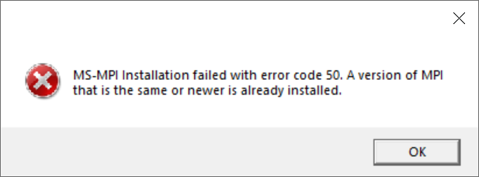
Under Windows Microsoft MPI is installed at that time as well. In case an older version is already installed, you will be asked to update to the delivered one, in case a later version is found an error message will pop up:
Now the installation is complete and Aspherix® is ready to go.
Uninstallation
To uninstall Aspherix®, launch the Aspherix_InstallManager (Aspherix_InstallManager.exe on Windows) in the Aspherix® installation folder. The following window appears:
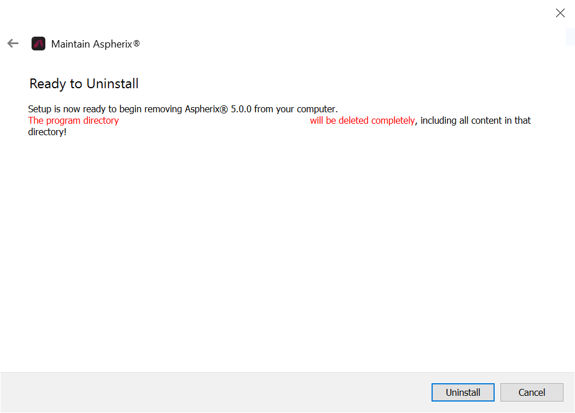
Click “Uninstall” to perform the uninstallation.
Installation of Salome
Salome is an open source software that can be used for the generation of CAD geometries and meshes for numerical simulations. It can be downloaded and used for free:
https://www.salome-platform.org/downloads/current-version
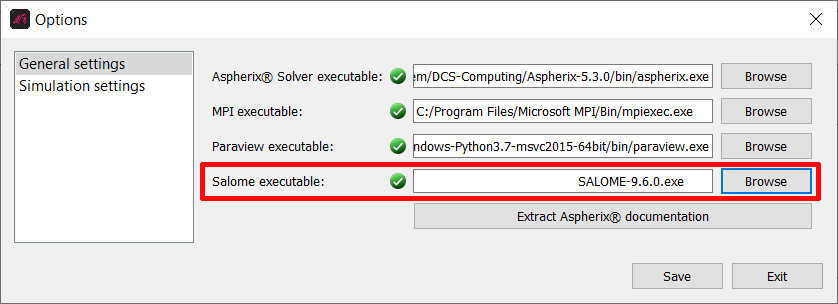
There are installers for Windows and many Linux distributions. For making Salome usable from within Aspherix® GUI please set the correct path in File/Options:
Text based installation
Aspherix® solver can also be installed without the graphical user interface using the provided installation script. This is useful on systems where no desktop environment is installed (eg. clusters). To perform the installation in interactive mode, run
$ ./AspherixInstallScript_7.1.sh -i
Alternatively, the necessary information can be provided to the script using command line options. Run
$ ./AspherixInstallScript_7.1.sh -h
to see a list of available options.
Note
The Aspherix® solver installer needs to be in the same directory as the installation script
Note
You may have to modify the permissions of the file to make it executable. Run
chmod a+x AspherixInstallScript_7.1.sh
to do so.
Description of the command line options
$ AspherixInstallScript_7.1.sh
Script for text-based installation of Aspherix-7.1
  flags:
      -i          enable interactive mode, flag, default false
      -d PATH     installation Directory, path, default $HOME/DCS-Computing/Aspherix-6.0.0/
      -c          also install the calibration modules, default false
      -g          also install the GUI modules, default false
      -l LICFILE  path of license file ending with .lic. This path must be absolute!
      -p  DEMOPW  demo password, string, default
      -s          install system wide, requres sudo privileges, flag,
                    invokes -r , default no
      -r          disable use default paths relative to the installation directory instead of config files,
                    flag, default false
      -u          link to /usr/local directory, flag, default no
      -U  PATH    usr library directory, path, default /usr/local/lib/
      -D          enable documentation and example extraction, flag, default false
      -e          set environment in .profile and .bashrc, flag, default no
      -Y          accept all license agreements of all selected packages, default false
      -h          display this text
The options are described in greater detail below. Please also refer to the graphical installation above for further details and for comparison.
-i: Interactive mode which queries the user on each option via text based input.
-d PATH: Path into which Aspherix will be installed in.
-c: If present, Aspherix Calibration will be installed and its templates will be unpacked. Note, the latter requires the correct license files and demo password (if applicable).
-g: If present, Aspherix GUI will be installed.
-l LICENSE: Path to a license file ending with .lic that was provided to you by DCS Computing. This path must be absolute!
-p DEMOPW: The demo password that you should have received from DCS Computing.
-s: Install the package configuration system wide, so that it is available for all users. Note, this requires running this script with root privileges.
-r: Install the package configuration for the current user (if -s is not set). If this flag is not set the configuration will be written into a subfolder of PATH specified by -d and will be accessible for all users of that installation.
-u: Link Aspherix executable to /usr/local/bin and place libraries into either /usr/local/lib or the path provided by -U.
-U PATH: If -u is set, Aspherix libraries will be linked to the specified PATH.
-D: If set, the installer will extract the documentation for the Aspherix toolbox and the examples. Note, this requires the correct license files and demo password (if applicable). If this is not yet available this can be performed after the installation by running aspherix -re.
-e: Set environment variables into the current user’s .profile and .bashrc files so that the installation information is passed to the corresponding environment variables like $PATH.
-Y: Accept, without further prompt, the license agreements and EULAs of all selected packages.
-h: Display the help text that is shown in the box above.
If you wish to review the installation or resolve an error then check the InstallationLog.txt file that is in your Aspherix installation folder. This file lists in detail any errors and provides some verbose output of the performed installation procedures.
Dependencies of the installer
Even though the installer can work without a graphical user interface, it still has dependencies to some graphics-related libraries. If an error similar to
./Installer-Aspherix_Linux_6.0.0: error while loading shared libraries: libxcb-glx.so.0: cannot open shared object file: No such file or directory
appears during installation, some of these libraries might be missing. The full list of dependencies is
libxcb-glx.so.0
libX11-xcb.so.1
libXrender.so.1
libXext.so.6
libX11.so.6
libxkbcommon-x11.so.0
libGL.so.1
On an Ubuntu system, these dependencies can be installed via
sudo apt-get install libx11-6 libx11-xcb1 libxcb-glx0 libxrender1 libxkbcommon-x11-0 libxext6 libgl1
On CentOS, the installation command looks like
yum install fontconfig libx11 libxcb mesa-libGL libxkbcommon libxkbcommon-x11
Depending on the exact version of the system, the package names can also slightly differ.
Testing your installation
After completing the installation you might want to test your installation. To check the version of your fresh install you can run
aspherix -version
which should show an Output similar to
Aspherix (Version Aspherix 7.1.0, compiled 2026-03-12-13:20:23 by vagrant, git commit 3efa378ae0fe305d4e235e2e5c66d2244884a712)
Note
Note, if the executable is not in your PATH environment variable you might need to explicitly call it using
cd /path/to/Aspherix/Installation
bin/aspherix -version
Please verify the version number and that it corresponds to the one of the installer.
Since the previous command does not use a license manager the next step is a test that checks for a valid license. To do so start Aspherix without any arguments, i.e.
aspherix
which should show an Output similar to
Aspherix (Version Aspherix 7.1.0, compiled 2026-03-12-13:20:23 by vagrant, git commit 3efa378ae0fe305d4e235e2e5c66d2244884a712)
RLM license checkout path for feature 'asx_solver' called from 'Aspherix(R) solver': /path/to/Aspherix/Installation/share/aspherix/license.lic
The program will then wait for your input and to test it you can enter
print "test"
which should be followed by test appearing on the next line. The program can be exited by entering the quit command. The full output then would look similar to the following:
Aspherix (Version Aspherix 7.1.0, compiled 2026-03-12-13:20:23 by vagrant, git commit 3efa378ae0fe305d4e235e2e5c66d2244884a712)
RLM license checkout path for feature 'asx_solver' called from 'Aspherix(R) solver': /path/to/Aspherix/Installation/share/aspherix/license.lic
print "test"
test
quit
If this works your installation is ready for your first simulation. To get started try out the example found in examples/solver/basic/chute_wear. You can run it with
# Linux:
mpirun -np 4 aspherix -in chute_wear.asx
# Windows:
mpiexec -np 4 aspherix.exe -in chute_wear.asx
And the output at the end should resemble the following
             1   100000      811    0.044424213   0.0081736165        1658682
Loop time of 12.1986 on 4 procs for 99999 steps with 811 atoms, finish time Fri Mar 12 13:20:23 2026


Pair  time (%) = 0.345505 (2.83235)
Neigh time (%) = 1.35206 (11.0837)
Comm  time (%) = 0.450405 (3.69228)
Outpt time (%) = 2.72746 (22.3588)
Wall  time (%) = 1.64436 (13.48)
Coupl time (%) = 0 (0)
Other time (%) = 5.67878 (46.5528)

Nlocal:    202.75 ave 330 max 0 min
Histogram: 1 0 0 0 0 0 0 2 0 1
Nghost:    18 ave 38 max 0 min
Histogram: 1 0 1 0 0 0 1 0 0 1
Neighs:    126.5 ave 235 max 0 min
Histogram: 1 0 1 0 0 0 0 0 1 1

Total # of neighbors = 506
Ave neighs/atom = 0.623921
Neighbor list builds = 2121
Dangerous builds = 0
Note, due to performance differences the numbers shown above might differ to the ones you might obtain. At this point we can confidently say that your installation was successful.
Upgrading to a newer version of Aspherix®
Currently only one version of Aspherix® can be installed on a system at once. If you want to upgrade to a newer version, please uninstall the old version (see section Uninstallation) and install the new version (see section Installation).
License management
Independently of the purchased number of coins Aspherix® can be installed on an arbitrary number of machines. The coins only restrict the number of parallel usage of the products. A continuous contact to a license server is required. The connection is checked every 100 seconds, and if 4 connection checks fail, Aspherix® shuts down automatically. Depending on the product you are using, the license server has to be reached via the internet or within your company’s intranet.
Online license server
For running Aspherix® with an online license server, the user only requires a license file and in some cases a password.
The license server is hosted at an online server. For a successful connection both port 5053 and a second, server-dependent port have to be accessible at server ls61.rlmcloud.com (please have a look at the troubleshooting section regarding connectivity checks). A constant, stable internet connection is required throughout the usage of any Aspherix® product. Short interruptions may be tolerated, but they must not exceed 400 seconds.
In-house license server
For running Aspherix® with an in-house license server, the user has to install a license server on a local machine which requires a setting and a license file. The license file also needs to be used when activating the local installations of the Aspherix® products within the network.
The in-house server needs to be hosted on a machine that is accessible by any device on which an installation of Aspherix® is installed. The connection to the license server has to be stable. Ports used for communication with the license server can be changed by the IT and must be set accordingly in the license file. For further informations check the instructions shipped with the server application. Short interruptions may be tolerated, but they must not exceed 400 seconds.
Note
Usually an in-house server uses three ports. One is for the optional web-service, the other two are essential for the communication between Aspherix® and the license server.
Note
The license server can broadcast, thus users can find a valid license as a last resort, if all the normal methods to find the server fail. This is enabled by default. Most company IT departments will want to disable this functionality, by using the server switch “-noudp”
Troubleshooting
If you encounter any issues on the way or are looking for answers, please have a look at the knowledge database) or create a ticket here.